As a responsible dog owner, you know that regular nail care is essential for your furry friend’s health and comfort. But when it comes to choosing between a nail grinder and traditional clippers, the decision can be confusing. Both tools have their place in your grooming kit, but understanding their differences will help you make the best choice for your dog’s specific needs.
Understanding the Basics: How Each Tool Works
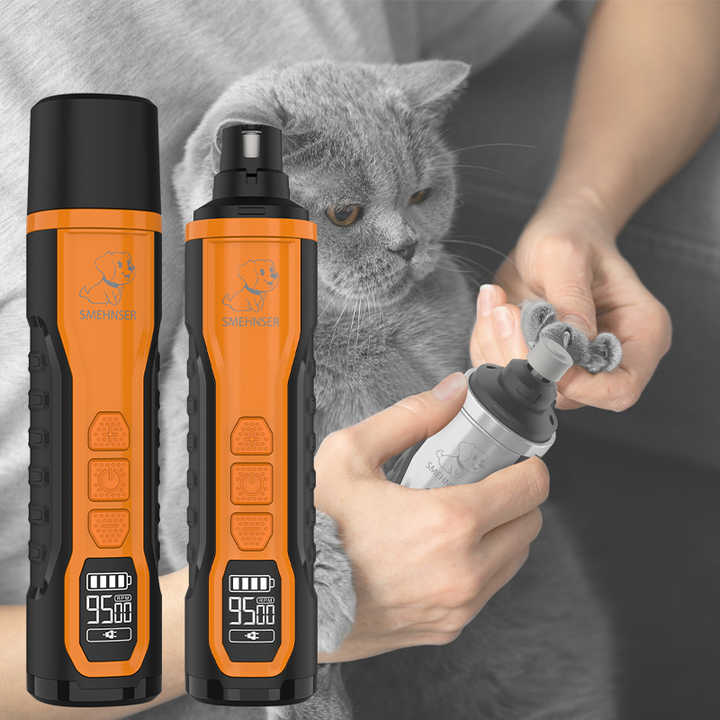
Nail Grinders operate using a rapidly rotating grinding wheel covered with abrasive material that gradually files down your dog’s nails. Most modern grinders are rechargeable and cordless, featuring multiple speed settings (typically 7,000-12,000 RPM) to accommodate different nail thicknesses and your dog’s comfort level. The grinding wheel needs replacement every few months as it wears down.
Nail Clippers come in three main styles: plier-style (most common), scissor-style, and guillotine-style. Plier-style clippers feature a spring mechanism between two blades that clamp down on the nail, often with a safety guard to prevent over-cutting. Scissor-style clippers resemble regular scissors and are best for small dogs, while guillotine clippers have a top blade that snips nails from top to bottom.
The Great Debate: Grinder vs Clipper
When to Choose a Nail Grinder
Nail grinders excel in several scenarios:
For Dogs with Dark Nails: The gradual filing process allows you to see the quick (the blood vessel inside the nail) as you approach it, significantly reducing the risk of cutting too deep and causing bleeding. This makes grinders particularly valuable for breeds with black nails where the quick is invisible.
For Anxious or Sensitive Dogs: While grinders do make a humming noise, many dogs find the gradual vibration less startling than the sudden “pop” of clippers. The slower process allows dogs to acclimate more easily, and you can stop frequently to reward calm behavior.
For Thick or Brittle Nails: Large breeds and older dogs often have thick nails that can splinter or crack when clipped. Grinders gently file away layers without the pressure that causes splitting, creating smooth, rounded edges that won’t snag on carpets or furniture.
For Beginners: If you’re new to nail trimming, grinders offer more forgiveness. Because you’re removing nail material gradually rather than making one decisive cut, you’re less likely to accidentally hit the quick. This builds confidence for both you and your dog.
When to Choose Nail Clippers
Traditional clippers remain the go-to choice for many situations:
For Quick Trims: Clippers are significantly faster than grinders. If your dog tolerates nail trimming well and you’re experienced with the process, you can complete the job in minutes rather than the 15-20 minutes a grinder might take.
For Budget-Conscious Owners: Clippers are much more affordable than electric grinders. A quality pair of clippers can last for years with proper maintenance, while grinders require replacement grinding heads every few months and may need battery replacement over time.
For Minimal Noise Sensitivity: Some dogs are more bothered by the continuous humming and vibration of grinders than by the quick “snip” of clippers. If your dog panics at the sound of power tools, clippers might be the better option.
For Small Dogs with Thin Nails: Small breeds typically have thinner nails that are easier to clip cleanly without splintering. The precision of clippers works well for these delicate nails.
Safety Considerations: Preventing Pain and Injury
Avoiding the Quick: The quick contains blood vessels and nerves, and cutting it causes pain and bleeding. With white nails, you can see the pink quick clearly. For dark nails, look for a small dark circle in the center when viewing from underneath. Always trim small amounts and stop before you reach this point.
Emergency Preparedness: Keep styptic powder or a styptic pencil on hand to stop bleeding if you accidentally cut the quick. Apply it directly to the nail tip, and the bleeding should stop within minutes. Stay calm – your dog will pick up on your anxiety.
Proper Technique: Hold your dog’s paw firmly but gently, extending each nail between your thumb and index finger. For clippers, cut at a 45-degree angle to match the nail’s natural shape. For grinders, work from the tip toward the quick, moving slowly and avoiding staying in one spot for more than 2 seconds to prevent heat buildup.
Step-by-Step Guide to Using Each Tool
Using a Nail Grinder:
- Acclimate Your Dog: Turn the grinder on near your dog for short periods over several days, rewarding calm behavior with treats. Touch their paws with the turned-off grinder to get them used to the sensation.
- Prepare the Area: Trim long hair around the nails to prevent it from getting caught in the grinder. Choose the appropriate grinding port based on your dog’s nail size.
- Start Grinding: Hold the grinder firmly and use your other hand to extend the nail. Begin at the tip and work toward the quick, using low speed for precision near the quick. Grind each nail for only a few seconds at a time.
- Reward and Repeat: After each nail, give your dog praise and a treat. Keep sessions short (5-10 minutes) and end on a positive note.
Using Nail Clippers:
- Position Your Dog: Place your dog on a non-slip surface. For small dogs, you may want to wrap them in a towel with only the paw exposed. For larger dogs, sit beside them rather than facing them directly.
- Identify the Quick: For white nails, look for the pink triangle inside the nail. For dark nails, look for the dark circle in the center. Plan to cut about 2-3mm before this point.
- Make the Cut: Hold the clippers at a 45-degree angle and make one smooth, decisive cut. Avoid multiple small cuts that can crush the nail.
- Smooth the Edges: Use a nail file to smooth any rough edges left by the clippers, preventing snagging.
Frequency and Maintenance
Most dogs need their nails trimmed every 3-4 weeks, but this varies based on activity level and the surfaces they walk on. Dogs who walk frequently on concrete or asphalt may naturally wear down their nails and need less frequent trimming.
Maintaining Your Tools:
- Grinders: Clean the grinding head after each use with a damp cloth to remove nail dust. Replace the grinding head when it becomes worn (typically every few months). Keep the battery charged.
- Clippers: Keep blades sharp and clean. Dull blades can crush nails rather than cutting cleanly. Store in a dry place to prevent rust.
The Verdict: Which Should You Choose?
There’s no one-size-fits-all answer, as the best tool depends on your dog’s individual needs:
Choose a Grinder if:
- Your dog has dark nails where the quick is hard to see
- Your dog is anxious about nail trimming
- You’re a beginner who wants to minimize the risk of cutting the quick
- Your dog has thick, brittle nails that tend to splinter
- You want perfectly smooth, rounded nails
Choose Clippers if:
- Your dog tolerates nail trimming well
- You’re on a budget
- You need to trim nails quickly
- Your dog has thin, white nails where the quick is easily visible
- Your dog is bothered by the noise and vibration of grinders
Many experienced dog owners keep both tools on hand – using clippers for quick maintenance and the grinder for finishing touches and smoothing edges. Whichever tool you choose, remember that patience, positive reinforcement, and regular practice will make nail trimming a stress-free experience for both you and your furry companion.